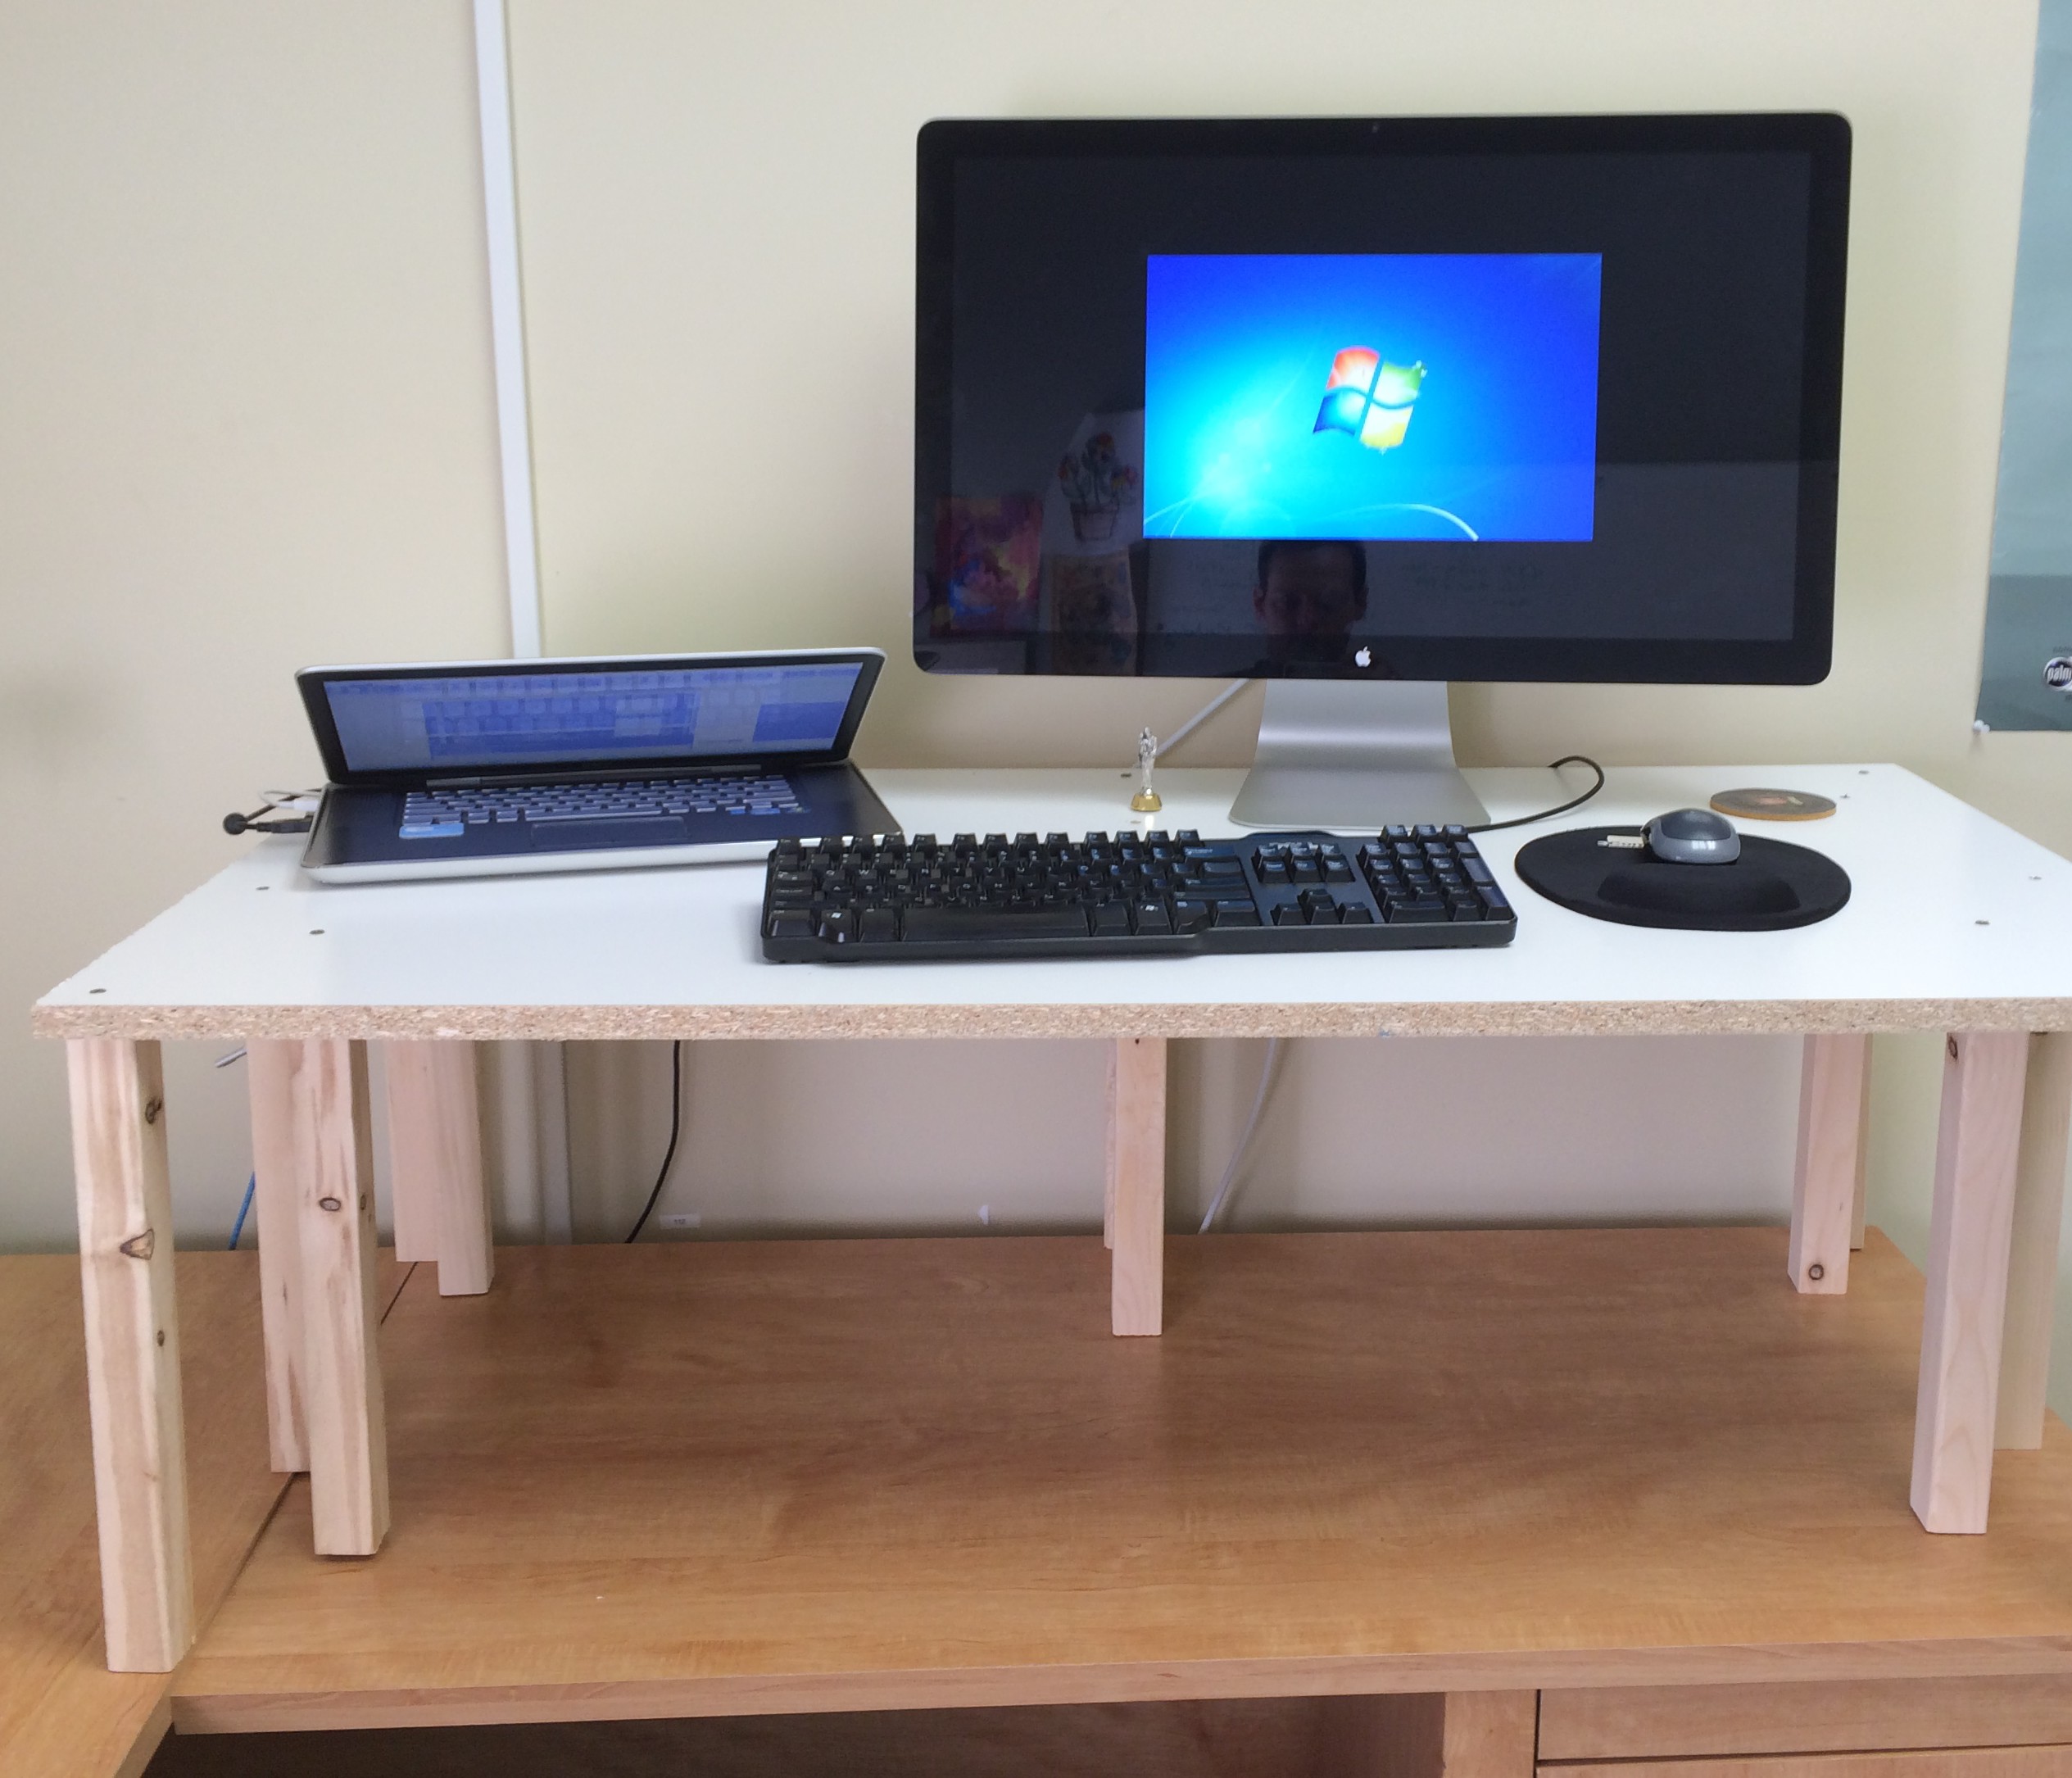
How to Build a $13 Standing Desk
At the end of every year I try to spend some time cleaning my office. Throughout the year papers, files and just general stuff begin to pile up on my desk and I like take a few moments and just get things cleaned up. Also, for Christmas this year many of us at the office got the Garmin Vivofit fitness tracker and for the first time I realized how inactive I am throughout the day by sitting at my desk. So as I cleaned my office I was also thinking about how I could be somewhat more active during the day. So I began to Google “Standing Desks” and I was not in the mood to buy and put together a new desk. So instead, I improvised and built a standing desk that I could set on top of my desk. So far I am one day into using it and I love it.
How to Build a Standing Desk
First of all I did some research on how high a standing desk should be and I read that it should come to your elbows. I’m 5’11” so here is how I went about it:
Total Time: 20 minutes
Materials
- (1) Desktop Panel – 3/4″ x 24″ x 48″
- (2) 2″x2″x8′ Pine boards
- #8 – 2 ½” screws
My Cuts
This was quite easy. Because I’m 5’11” my elbows came to about 15″ off the desk. So I cut both of the 2″x 2″x 8″ pine boards into 15″ pieces which left me with 12 2″ x 2″ x 15″ pieces. My desktop panel was already cut at the hardware store.
Instructions
- Screw the 2″ x 2″ x 15″ pieces into the desktop panel so it is strong enough to hold your computer equipment.
- Place on desk
- Go to Work
That’s it! If you want to improve the cosmetics of it you can add trim around it, paint it or use better quality wood.
Enjoy!!


